Love this? Pin it for later! 📌
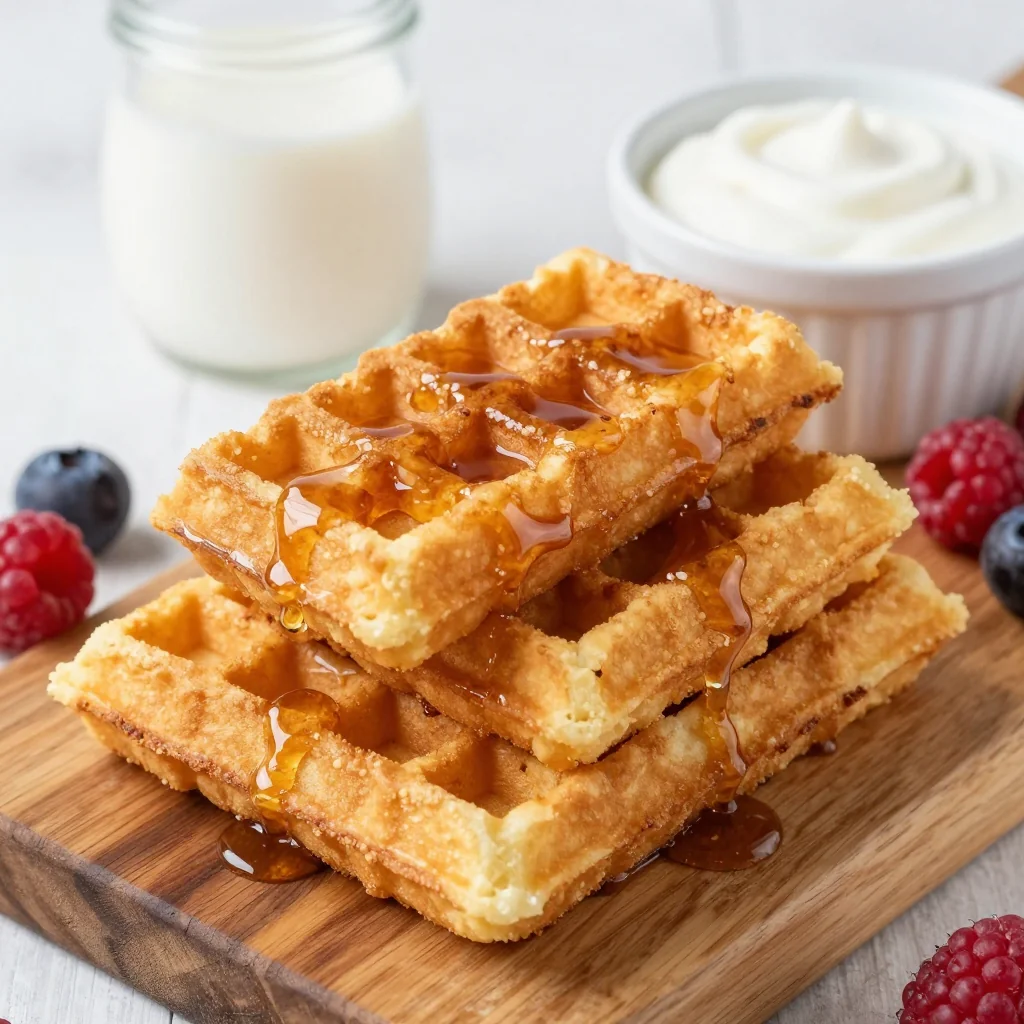
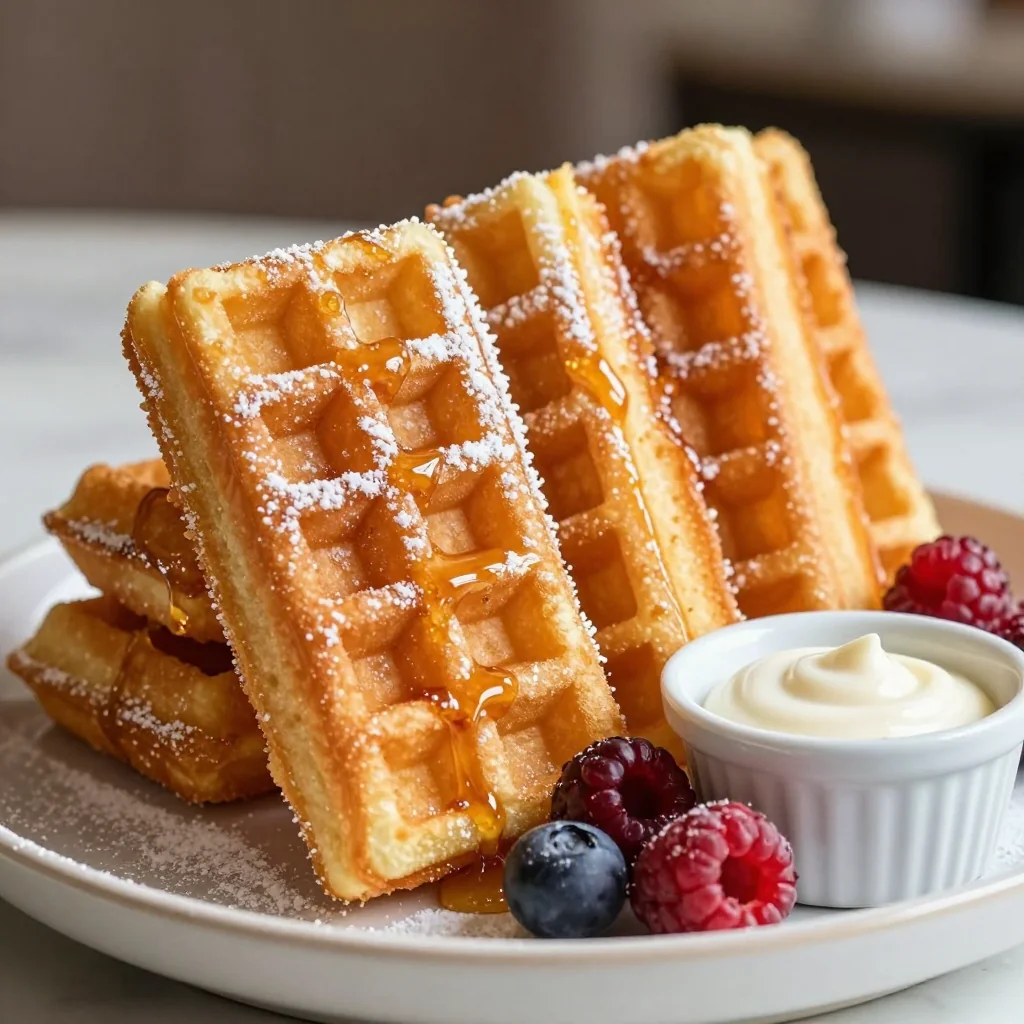
There’s something about the first bite of a perfectly crisp waffle stick that takes me straight back to Saturday-morning cartoons and the smell of melting butter drifting through my childhood kitchen. Fast-forward to life with three school-age kids, two jobs, and a dog who thinks 5:30 a.m. is “breakfast o’clock,” and those leisurely weekends feel like a distant dream. That’s why I set out to create a freezer-friendly version of our favorite diner treat—one I can pull out on a random Tuesday, pop into the toaster, and serve with a drizzle of maple syrup before the school bus rounds the corner. After eighteen test batches (yes, eighteen!), I finally landed on a batter that freezes, reheats, and tastes as tender and flavorful as the day it was made. These waffle sticks have saved our mornings more times than I can count, and I’m thrilled to share every secret I’ve learned so you can stock your freezer, too.
Why This Recipe Works
- Make-Ahead Magic: Double or triple the batch, flash-freeze, and grab what you need—no mixing bowls at dawn.
- Kid-Approved Shape: Slim sticks fit perfectly in toaster slots and lunch-box bento dividers.
- Whole-Grain Option: Swap in white whole-wheat flour for extra fiber without sacrificing fluff.
- No-Sog Guarantee: A whisper of cornstarch keeps the interior tender while the edges stay crisp after reheating.
- Customizable Flavors: Add cinnamon, cocoa, or citrus zest to the dry mix for endless variety.
- Dietary Flexibility: Dairy-free milk and oil instead of butter keep them vegan without tasting “healthy.”
Ingredients You'll Need

Great freezer waffle sticks start with everyday staples, but the way you treat them makes all the difference. First up: flour. I use a 50-50 blend of all-purpose and white whole-wheat for nutty flavor and sturdy structure, but 100 % all-purpose works if that’s what you have. Cornstarch is the quiet hero—just two tablespoons lighten the crumb so the sticks don’t turn brick-solid in the freezer. For sweetness, a modest quarter-cup of brown sugar keeps the edges caramel and the interior moist; feel free to sub coconut sugar or maple sugar for deeper notes. Leavening is a balanced duo of baking powder and soda; the soda reacts with the buttermilk for extra lift, which translates to extra nooks for catching syrup later.
Speaking of buttermilk, it’s the insurance policy against rubbery reheats. If you don’t keep it on hand, whisk 1 tablespoon white vinegar into any milk (dairy or oat) and let it stand five minutes. Eggs supply structure, but for ultra-convenience I’ve tested with flax “eggs” and the results were surprisingly springy—great if you need an allergy-friendly batch. Oil rather than melted butter keeps the sticks supple when cold; choose a neutral oil like avocado or sunflower. Finally, a capful of vanilla and a pinch of salt round out the batter so it tastes bakery-level luxurious even after a month in the freezer.
How to Make Freezer Friendly Waffle Sticks for Breakfast
Whisk Dry Team
In a large bowl, combine 1 cup all-purpose flour, 1 cup white whole-wheat flour, 2 tablespoons cornstarch, 2 teaspoons baking powder, ½ teaspoon baking soda, ¼ teaspoon fine sea salt, and ¼ cup brown sugar. Whisk for a full 30 seconds to evenly distribute the leaveners; pockets of soda can taste metallic after freezing.
Blend Wet Wonders
In a separate bowl, whisk 2 large eggs, 1¾ cups buttermilk, ⅓ cup neutral oil, 2 teaspoons vanilla, and 1 tablespoon maple syrup. The syrup adds subtle flavor complexity and helps the exterior brown faster—important for miniature sticks that cook quickly.
Marry Wet & Dry
Pour wet into dry and fold with a spatula just until the flour disappears. Lumps are okay; over-mixing develops gluten and yields tough sticks. Let the batter rest 10 minutes so the starches hydrate and the baking powder starts its first rise.
Preheat & Grease
Heat your waffle stick iron to medium-high. Lightly brush top and bottom plates with oil; even “non-stick” plates need insurance when syrup is involved. If you only have a standard waffle iron, you can slice the waffles into strips later—no special gadget required.
Portion Perfectly
Using a piping bag (or zip bag with corner snipped), fill each stick mold three-quarters full. Overfilling causes the batter to ooze and fuse sticks together, which complicates the freeze-and-separate step. Close lid and set timer for 3 minutes.
Check & Rotate
Peek after 2½ minutes. The sticks should release easily and sport a deep golden hue. If your iron heats unevenly, rotate it 180° halfway through for uniform color. Pale sticks freeze poorly—they turn gummy instead of crisp.
Cool on Rack
Transfer finished sticks to a wire rack. Avoid stacking; steam trapped between layers softens the crust. Let them breathe five minutes. This step is crucial—freezing warm sticks creates ice crystals that translate to soggy reheats.
Flash-Freeze
Line a sheet pan with parchment, arrange sticks in a single layer, and slide into the freezer for 2 hours. Flash-freezing prevents clumping so you can grab exactly eight sticks on a hectic morning without prying apart a waffle brick.
Pack & Label
Transfer frozen sticks to gallon freezer bags. Press out excess air, slip in a small sheet of parchment between layers, and label with the date and reheating instructions. They’ll keep three months, but good luck making them last that long.
Reheat to Crisp
From frozen, pop sticks directly into a toaster on the medium setting. First cycle defrosts; second cycle crisps. Alternatively, bake at 375 °F for 6 minutes, flipping halfway. Microwave reheating is possible but sacrifices crunch—use only in emergencies.
Expert Tips
Measure by Weight
A digital scale eliminates the #1 cause of tough waffles: too much flour. 120 g per cup is the sweet spot.
Siphon Batter
A cheap squeeze bottle lets you fill molds quickly and evenly, reducing drips that burn on the iron.
Season the Iron
After every few uses, brush with oil and heat 5 minutes to maintain a shiny, stick-free surface.
Freeze Syrup Coins
Portion maple syrup into silicone mini-muffin trays; freeze. Pop one “syrup coin” into lunchboxes; it thaws by recess.
Mini Chocolate Shield
If adding chips, toss them in ½ teaspoon flour first to prevent sinking and scorching on the iron.
High-Altitude Fix
Above 5,000 ft? Reduce baking powder by ¼ teaspoon and add 1 tablespoon extra liquid to combat dryness.
Variations to Try
- Apple Pie: Fold in ½ cup finely diced apple and ½ teaspoon cinnamon. Serve with yogurt dip.
- Double Chocolate: Replace 3 tablespoons flour with cocoa powder; add ⅓ cup mini chips.
- Lemon Poppy: Zest of 1 lemon + 1 tablespoon poppy seeds. Swap vanilla for lemon extract.
- Savory Cheddar: Omit sugar, add ½ cup shredded sharp cheddar and chopped chives. Serve with tomato soup.
- Pumpkin Spice: Sub half the buttermilk with canned pumpkin; add ½ teaspoon pie spice.
- Gluten-Free: Replace flours with 2 cups oat flour + ¼ cup almond flour; rest batter 15 minutes.
Storage Tips
Freezer: Once flash-frozen, transfer sticks to an airtight bag with parchment between layers. They maintain peak quality for 3 months but remain safe indefinitely at 0 °F. Label the bag with reheating instructions so babysitters or partners can handle breakfast duty without texting you.
Refrigerator: Not recommended. The moist environment accelerates staling and yields rubbery texture upon reheating.
Counter: If you plan to eat within 24 hours, store cooled sticks in a paper-towel-lined container covered loosely with foil. Reheat in a toaster oven at 350 °F for 3 minutes.
Pack-&-Go: For school lunches, place frozen sticks directly into insulated lunch boxes; they thaw by noon and can be eaten handheld, no syrup required.
Frequently Asked Questions
Freezer Friendly Waffle Sticks for Breakfast
Ingredients
Instructions
- Mix Dry: Whisk flours, cornstarch, baking powder, baking soda, salt, and brown sugar in a large bowl.
- Blend Wet: In another bowl, whisk eggs, buttermilk, oil, vanilla, and maple syrup until smooth.
- Combine: Pour wet into dry; fold just until combined. Lumps are okay. Rest 10 minutes.
- Cook: Preheat waffle stick iron; lightly oil. Fill molds ¾ full; cook 3 minutes until golden.
- Cool: Transfer to a rack; cool completely, about 20 minutes.
- Flash-Freeze: Arrange sticks on a parchment-lined sheet; freeze 2 hours.
- Store: Transfer to freezer bags; label. Keep frozen up to 3 months.
- Reheat: Toast on medium or bake at 375 °F for 6 minutes, flipping halfway.
Recipe Notes
Do not microwave for best texture. Always reheat from frozen—no need to thaw.