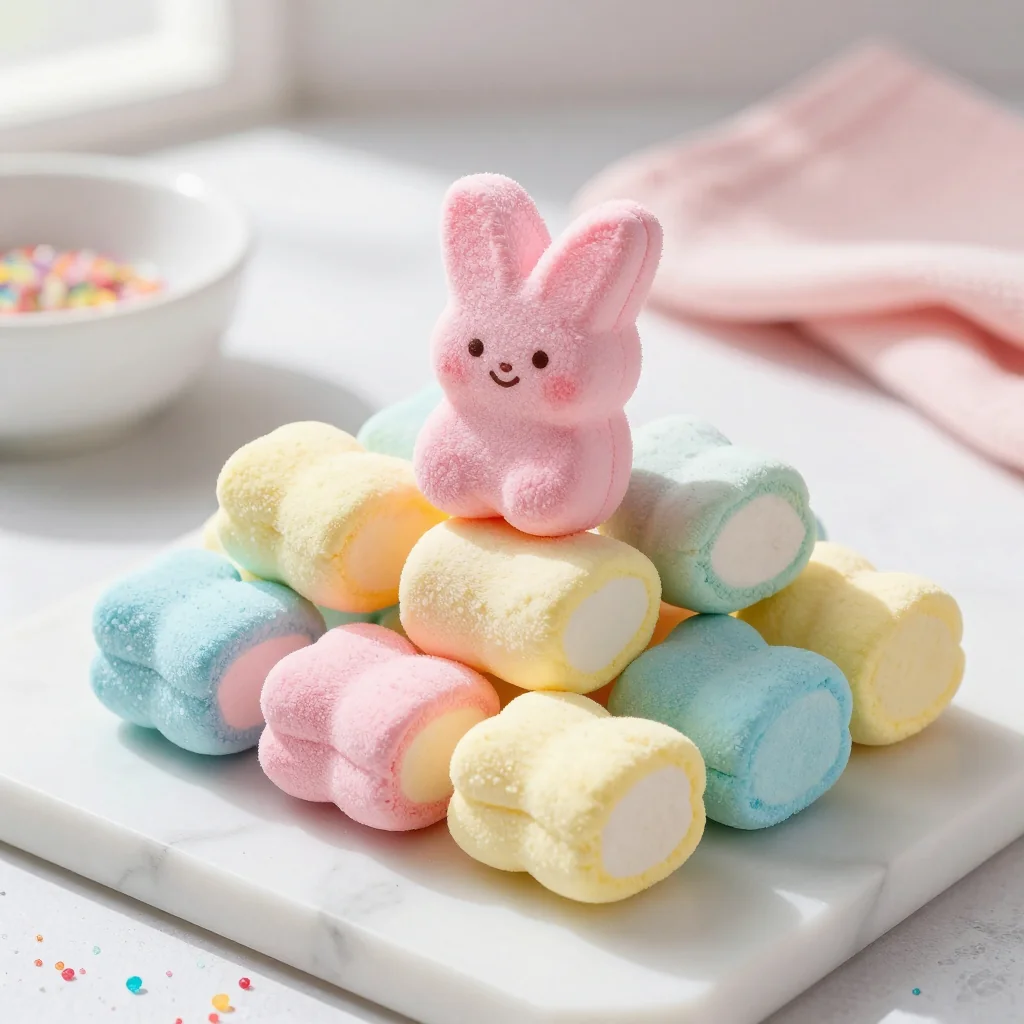
Fluffy, pastel‑colored marshmallows topped with crunchy, rainbow‑sugar crystals—perfect for celebrations or a whimsical snack.
When I was a kid, Easter mornings meant a frantic scramble for the most colorful Peeps in the pantry, each one a sugary, gelatinous promise of spring. One year, after a particularly rainy holiday, I found myself yearning for that same burst of joy but wanted something a little softer, a little more elegant. That yearning sparked an experiment in my tiny kitchen, blending the airy lightness of homemade marshmallows with the playful hue of Peeps and a sparkling coating of colored sugar.
The idea is rooted in classic American confectionery, where marshmallows have long been a canvas for creativity—from toasted s’mores to flambéed desserts. Peeps, on the other hand, are iconic symbols of festive indulgence, their bright colors and sweet flavor instantly transporting you to a world of childhood wonder. By marrying the two, I discovered a texture contrast that’s both melt‑in‑your‑mouth and delightfully crunchy.
In this recipe, you’ll learn how to craft perfectly aerated marshmallows from scratch, incorporate the iconic Peeps into the mix, and finish each bite with a shimmering dusting of colored sugar that catches the light like tiny confetti. The process is straightforward, yet each step is calibrated to ensure the marshmallows retain their fluff without collapsing, and the sugar coating adheres without clumping.
I’m thrilled to share this whimsical treat with you—whether you’re planning a birthday party, an Easter brunch, or simply craving a nostalgic snack with a grown‑up twist. Let’s dive in and create a batch that will make both kids and adults smile.
🌟 Why This Recipe Will Capture Your Heart
From texture to visual appeal, this dessert checks every box for a memorable sweet experience.
- ✨ Irresistible Texture Fusion: The marshmallow’s cloud‑like softness pairs with the slight chew of Peeps, while the colored sugar adds a satisfying crunch that makes each bite multidimensional.
- ✨ Vibrant Visual Impact: The rainbow of colored sugar crystals creates a festive look that’s perfect for photo‑ready moments and special occasions.
- ✨ Customizable Sweetness: You control the level of sweetness by adjusting the amount of sugar in the coating, making it suitable for both kids who love extra sweet and adults who prefer a subtler flavor.
- ✨ No Baking Required: The recipe is stovetop‑only, so you avoid heating your oven and can prepare the treats even on a hot summer day.
- ✨ Fun Family Activity: Rolling, coating, and arranging the marshmallows become a hands‑on activity that kids love, turning cooking into quality time.
- ✨ Long Shelf Life: Properly stored, these marshmallows stay fresh for weeks, allowing you to make a batch ahead of a celebration and keep the joy going.
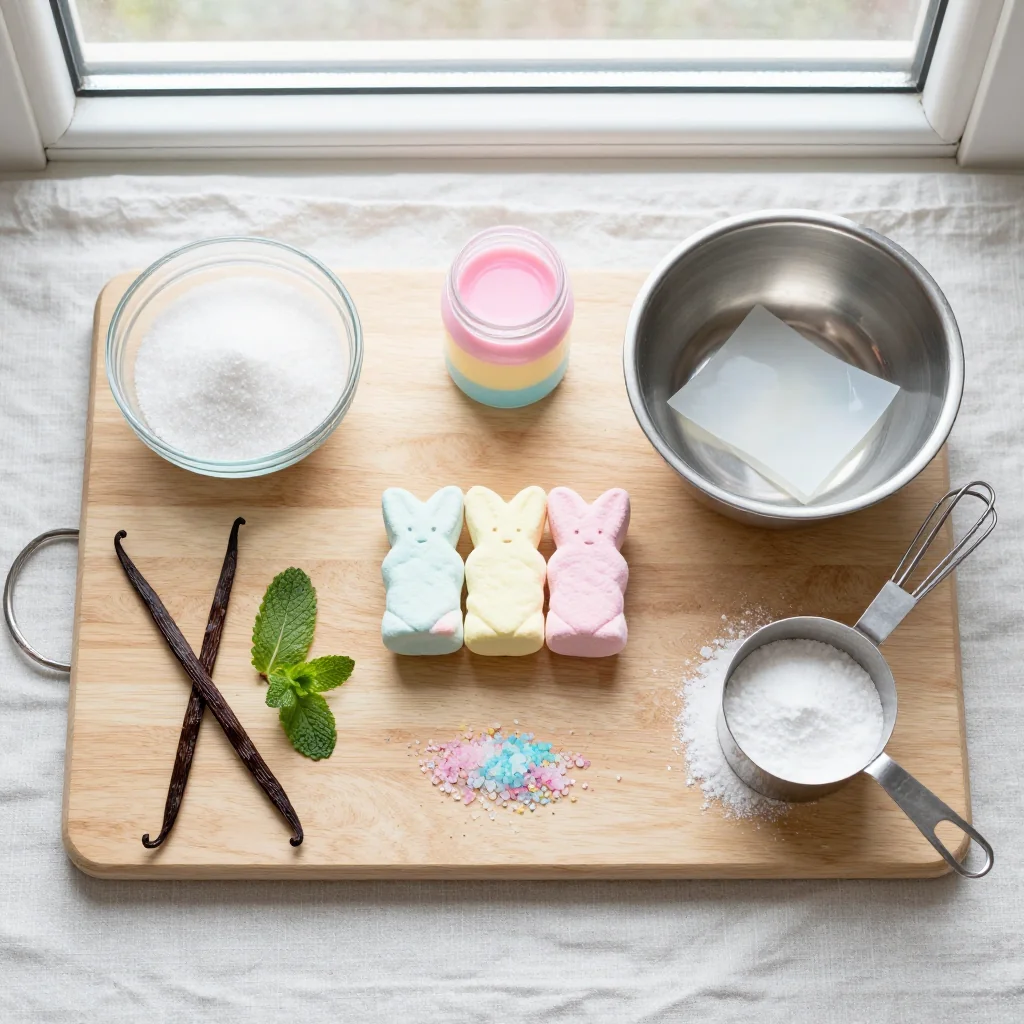
🥗 Ingredients
📝 Complete Ingredient List
For the Marshmallow Base:
For the Peeps Integration:
🔍 Focus on Key Ingredients
Granulated Sugar
Granulated sugar provides the primary sweetness and, when dissolved with corn syrup, creates a stable syrup that traps air during the whipping process. Choose a fine‑grained, pure cane sugar for a clean flavor without any off‑notes.
Light Corn Syrup
Corn syrup acts as an invert sugar, preventing crystallization and giving the marshmallow its characteristic chewiness. Its high fructose content keeps the mixture glossy and helps maintain the airy structure once cooled.
Peeps
Peeps are essentially mini‑marshmallows already flavored and colored. By cutting them into smaller pieces and folding them into the freshly whipped marshmallow base, you add pockets of intensified flavor and an eye‑catching burst of color.
🔄 Quick Substitutions
| If you don’t have... | Use instead... |
|---|---|
| corn syrup | honey (use 2/3 cup) |
| egg whites | aquafaba (3 tbsp per egg white) |
| colored sugar | sprinkles mixed with regular sugar |
👨🍳 Step‑by‑Step Instructions
Follow these detailed steps to ensure your marshmallows achieve the perfect fluff and that the colorful coating adheres evenly.
📋 Phase 1: Preparation and Mise en Place
Gather all tools, measure ingredients, and set up a double boiler.
Prepare the Syrup
In a medium saucepan, combine the granulated sugar, corn syrup, and water. Place the pan over medium heat, stirring gently until the sugar dissolves completely. Once dissolved, stop stirring and allow the mixture to boil. Use a candy thermometer and bring the temperature to 115 °C (239 °F), the soft‑ball stage. This precise temperature ensures the syrup will set correctly when whipped later.
Separate and Whisk Egg Whites
While the syrup is heating, separate the egg whites from the yolks, ensuring no yolk contaminates the whites. Transfer the whites into the bowl of a stand mixer fitted with the whisk attachment. Add the cream of tartar and a pinch of salt. Begin whisking on low speed until frothy, then increase to medium‑high and whisk until soft peaks form.
🔥 Phase 2: Whipping the Marshmallow Base
Combine the hot syrup with the whipped egg whites to create the airy marshmallow mixture.
Incorporate the Hot Syrup
When the syrup reaches 115 °C, remove it from the heat. With the mixer running on medium speed, carefully pour the hot syrup in a thin, steady stream into the egg whites. The mixture will appear to separate at first, but continue whisking. Within a minute, it will transform into a glossy, thick batter.
Whisk to Stiff Peaks
Increase the mixer speed to high and whisk for 8–10 minutes. The batter should become opaque, increase in volume, and hold stiff peaks when the whisk is lifted. Add the vanilla extract in the last minute of whipping for a subtle aromatic note.
Fold in Peeps
While the batter is still glossy, gently fold in the Peeps using a spatula. Cut the Peeps into quarters before folding so they distribute evenly without sinking. The bright colors will create a marbled effect throughout the marshmallow base.
✨ Phase 3: Shaping, Coating, and Final Touches
Set the marshmallow, cut into portions, and coat with colored sugar.
Transfer to a Pan
Lightly grease a 9×13‑inch baking pan with a neutral oil and dust it with a thin layer of cornstarch. Pour the marshmallow mixture into the pan, smoothing the top with an offset spatula. Allow it to set at room temperature for 2–3 hours, or until firm to the touch.
Cut into Squares
Once set, dust a sharp knife with cornstarch and cut the marshmallow into 2‑inch squares. Dust each piece with a little more cornstarch to prevent sticking.
Roll in Colored Sugar
Place the colored sugar crystals in a shallow dish. Gently roll each marshmallow square in the sugar until fully coated. The sugar will adhere thanks to the slight moisture on the surface and create a sparkling crust.
Store or Serve Immediately
If you’re serving right away, arrange the marshmallows on a decorative platter. For later enjoyment, store them in an airtight container with a paper towel to absorb excess moisture.
💡 Expert Tips & Tricks
🛒 Choosing the Best Ingredients
Opt for a high‑quality corn syrup that lists “glucose syrup” as the first ingredient; this ensures a clear, non‑grainy texture. When selecting Peeps, choose a mix of colors and flavors—classic pink, orange, and yellow work beautifully. Fresh egg whites are essential; if your eggs are older, consider using aquafaba as a plant‑based alternative.
🔪 Preparation Techniques
Before whisking, ensure the mixing bowl is completely clean and free of any grease—any fat will prevent the egg whites from reaching full volume. When folding the Peeps, use a gentle “cut‑and‑fold” motion to keep the air bubbles intact. Dusting the pan with cornstarch rather than flour avoids any unwanted flavor transfer.
🌡️ Mastering the Cooking Stage
Maintain a steady simmer when heating the syrup; a rolling boil can cause caramelization, altering the flavor. Use a reliable candy thermometer and calibrate it before use. If the syrup overshoots 118 °C, the marshmallow may become too firm and lose its airy quality.
🍽️ Presentation & Service
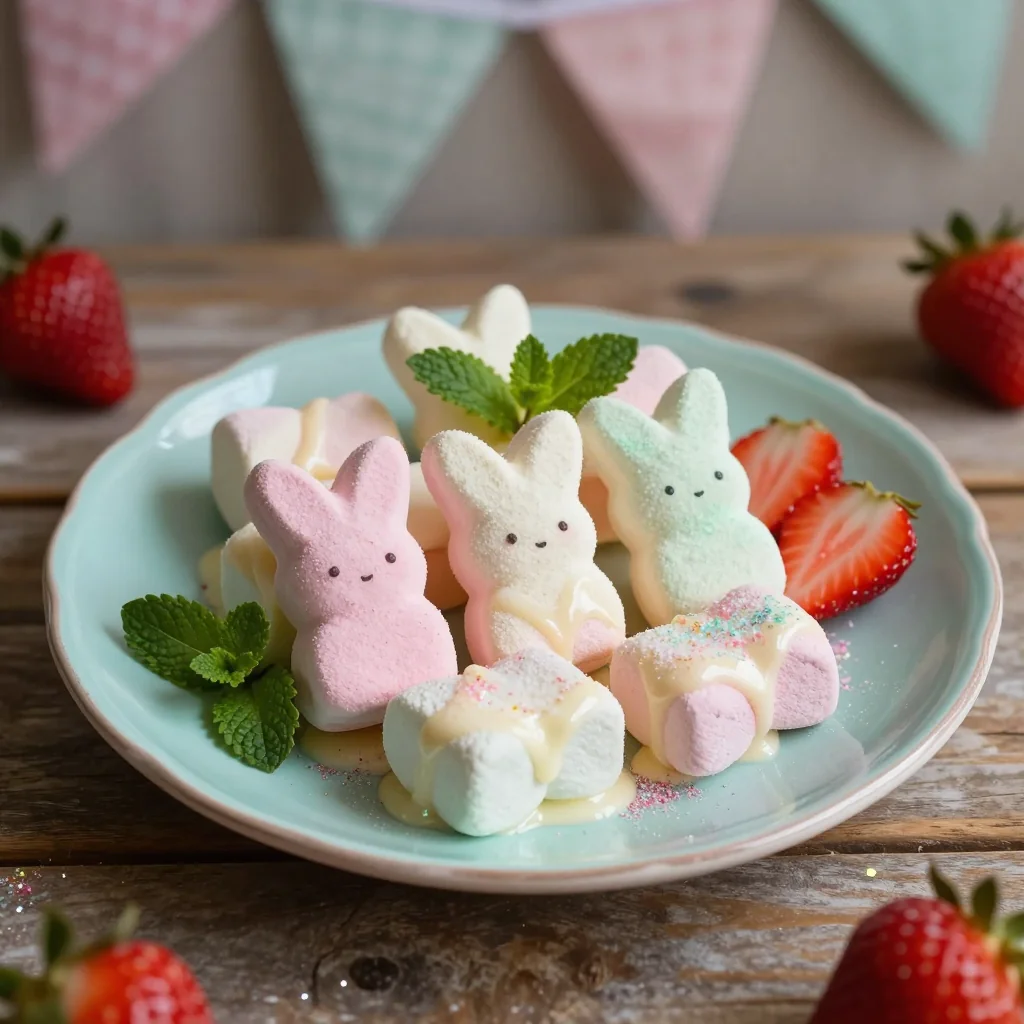
Arrange the finished squares on a pastel‑colored plate for a cohesive look. Garnish with a few whole Peeps or a drizzle of melted white chocolate for extra elegance. Serve with a side of fresh berries to cut through the sweetness and add a hint of acidity.
🏆 Pro Tips
Professional pastry chefs know that subtle adjustments can elevate a good recipe to an unforgettable one.
- 🎯 Control the Air Incorporation: Start the whisk at low speed to create a stable foam before ramping up. This prevents the batter from becoming too airy too quickly, which can cause collapse later.
- 🎯 Temperature Precision: Using an infrared thermometer can give a quicker read on the syrup’s surface temperature, ensuring you hit the soft‑ball stage exactly.
- 🎯 Sugar Crystal Size: For a finer sparkle, pulse the colored sugar in a food processor for a few seconds. Larger crystals give a crunchy bite, while finer ones melt slightly on the tongue.
- 🎯 Layered Flavor: Add a drop of almond extract alongside vanilla for a nuanced background note that pairs beautifully with the sugary coating.
- 🎯 Moisture Management: If you notice the marshmallows sticking after coating, lightly dust them with additional cornstarch before serving.
- 🎯 Shelf‑Life Extension: Store the marshmallows in a climate‑controlled pantry (around 20 °C) to prevent sugar bloom, which can cause the coating to become grainy.
“The secret to perfect marshmallows is patience and precision; a few extra seconds at the right temperature make all the difference.” — Dominique Ansel
🔄 Variations & Adaptations
This recipe is a versatile canvas that welcomes creative twists, dietary adjustments, and seasonal flavors.
🥬 Vegetarian/Vegan Version
Replace egg whites with aquafaba (the liquid from canned chickpeas). Use 3 Tbsp of aquafaba per egg white, and follow the same whipping method. Ensure the corn syrup is vegan (most are, but double‑check the label).
- Substitution 1: Aquafaba instead of egg whites – provides similar foam stability.
- Substitution 2: Use organic cane sugar for a cleaner, vegan‑friendly sweetener.
🌶️ Flavor Variations
Swap the vanilla for other extracts or infusions to create distinct flavor profiles.
Spicy Version:
Add ¼ tsp of ground cinnamon and a pinch of cayenne pepper to the syrup. The subtle heat contrasts with the sweet coating.
Mediterranean Version:
Incorporate a drizzle of orange‑blossom honey after the marshmallow sets, and coat with a mixture of pistachio‑colored sugar and finely chopped toasted almonds.
Asian Fusion Version:
Replace vanilla with ½ tsp of matcha powder dissolved in a tablespoon of water, and coat with black sesame sugar crystals for a nutty, earthy twist.
⚠️ Dietary Adaptations
Gluten‑Free:
All ingredients are naturally gluten‑free; just ensure the colored sugar you purchase is processed in a gluten‑free facility.
Lactose‑Free:
No dairy is used, making this recipe already suitable for lactose‑intolerant individuals.
Low‑Calorie:
Reduce the sugar in the coating by 30 % and replace half of the colored sugar with finely ground freeze‑dried strawberries for natural sweetness and color.
👶 Kid‑Friendly Version
Use only pastel‑colored Peeps and avoid adding any extra extracts that might be too strong for little palates. Serve with a side of fresh fruit to balance the sweetness.
📦 Storage & Reheating
🧊 Conservation
In the Refrigerator:
- Duration: 10 days
- Recommended container: airtight plastic box with a paper towel on top
- Tip: Place a slice of bread in the container to absorb excess moisture.
In the Freezer:
- Duration: 3 months
- Method: Wrap each marshmallow square individually in parchment paper, then place in a zip‑top bag.
- Defrosting: Transfer to the refrigerator overnight; avoid microwaving directly from frozen.
💡 Keep the marshmallows away from strong‑smelling foods; they can absorb odors due to their high sugar content.
♨️ Reheating
🔥 Oven (Recommended):
- Preheat to 150 °C (300 °F).
- Place marshmallows on a parchment‑lined tray and cover loosely with foil.
- Heat for 5 minutes, then remove foil and heat an additional 2 minutes to refresh the sugar crust.
⚡ Microwave (Quick):
- Place a single marshmallow on a microwave‑safe plate.
- Cover with a microwave‑safe lid.
- Heat on medium power for 10‑12 seconds; check and repeat if needed.
🍳 Stovetop:
If you prefer a toasted exterior, gently pan‑sear each marshmallow for 15 seconds per side over low heat, using a non‑stick skillet.
🍷 Perfect Pairings
🥗 Side Dishes
- Fresh Berry Salad: A mix of strawberries, blueberries, and mint provides acidity that balances the sweetness.
- Light Citrus Yogurt: Plain Greek yogurt with a drizzle of lemon zest offers a creamy contrast.
- Honey‑Glazed Carrots: The earthiness of carrots pairs well with the sugary crunch.
🍷 Wine & Beverage Pairings
- Prosecco: Its bright bubbles cut through the marshmallow’s richness.
- Riesling (off‑dry): The subtle fruit notes echo the candy flavors.
- Non‑Alcoholic Sparkling Apple Cider: A kid‑friendly fizz that mirrors the celebratory feel.
🍰 Complementary Courses
Start the meal with a light citrus vinaigrette salad, follow with the marshmallows as a playful palate cleanser, and finish with a tangy lemon tart to bring the sweetness full circle.
❓ Frequently Asked Questions
Q: Can I use regular sugar instead of colored sugar for the coating?
A: Absolutely. Regular granulated sugar will give a plain look, but you can add a few drops of food coloring and toss the sugar to create a homemade colored version. The texture remains the same; only the visual appeal changes.
Q: How do I prevent the marshmallow from becoming too sticky after coating?
A: Lightly dust the coated marshmallows with a thin layer of cornstarch after the sugar sets. Store them in a container with a paper towel to absorb any residual moisture, which keeps the exterior crisp.
Q: What if I don’t have a candy thermometer?
A: You can perform the “soft‑ball” test by dropping a small amount of syrup into a bowl of ice water. If it forms a soft, pliable ball that can be rolled between your fingers, the temperature is correct.
Q: Can I add other candies besides Peeps?
A: Yes! Mini chocolate chips, fruit gummies, or even crushed candy canes can be folded in for different flavor profiles. Just be mindful of the added moisture content.
Q: How long will the colored sugar coating stay crunchy?
A: If stored properly in an airtight container, the coating will stay crisp for up to a week. After that, humidity may cause it to soften slightly, but the marshmallow interior will remain soft.
Q: Is it possible to make this recipe ahead of a large event?
A: Definitely. Prepare the marshmallow base a day in advance, cut and coat the pieces, then store them in the refrigerator. Reheat briefly before serving to restore the sugar’s sparkle.
🎉 Let’s Get Cooking!
This homemade take on Peeps marshmallows offers a perfect blend of nostalgia and culinary craftsmanship. The airy interior, vibrant Peeps ribbons, and glittering sugar coating create a multisensory delight that’s sure to become a staple at your celebrations. By mastering the temperature control and gentle folding techniques, you’ll achieve a professional‑grade texture that rivals any store‑bought treat.
Remember, the beauty of this recipe lies in its flexibility—experiment with flavors, adjust sweetness, or swap ingredients to suit dietary needs. Share your creations, ask questions, and let the community celebrate your successes. Happy marshmallow making!
Have you tried this recipe?
Leave a comment and rating below! Share your photos on Instagram with #PeepsMarshmallowMagic for a chance to be featured on our blog.
Homemade Peeps Marshmallows with Colored Sugar
Fluffy marshmallows studded with colorful Peeps and dusted in sparkling sugar.
📝 Ingredients
Marshmallow Base
Peeps & Coating
👨🍳 Instructions
- 1
Combine sugar, corn syrup, and water in a saucepan; heat to 115 °C while stirring until dissolved.
- 2
Whisk egg whites with cream of tartar and salt until soft peaks form.
- 3
Slowly pour the hot syrup into the whisked egg whites while the mixer runs on medium speed.
- 4
Increase speed to high and whisk for 8‑10 minutes until the mixture becomes glossy and holds stiff peaks; add vanilla at the end.
- 5
Fold chopped Peeps gently into the marshmallow batter.
- 6
Spread the mixture into a greased, cornstarch‑dusted pan; let set for 2‑3 hours at room temperature.
- 7
Cut the set marshmallow into 2‑inch squares and dust each piece with cornstarch.
- 8
Roll each square in colored sugar crystals until fully coated.
- 9
Store in an airtight container or serve immediately; reheat gently if desired.
- 10
Enjoy with your favorite beverage and share the joy!
🥗 Nutrition Facts (per serving)
*Nutritional values are estimates based on standard ingredients.
📚 You Might Also Like
Rainbow Fruit Tart
Chocolate Peanut Butter Marshmallows
Lemon Cream Cheese Puff Pastry


💬 Comments & Reviews
Leave a Comment
No comments yet – be the first to share your thoughts!