Okay, picture this: it’s a rainy Sunday afternoon, I’m juggling a half‑finished batch of cinnamon rolls, a sticky‑sweet glaze that’s threatening to turn my countertop into a slip‑n‑slide, and a sudden craving for something that feels like a hug from the inside out. I tried to salvage the chaos by slapping a few leftover cream cheese onto a regular roll, but the result was about as exciting as cardboard. Then, in a moment of sheer kitchen desperation (and a dash of daring), I grabbed a pack of King Hawaiian rolls, because they’re the buttery, slightly sweet clouds you never knew you needed, and thought, “What if I turn these into a cheesecake‑filled Danish?” The idea was wild, the stakes were high, and I was ready to prove that a simple pantry raid could birth a masterpiece.
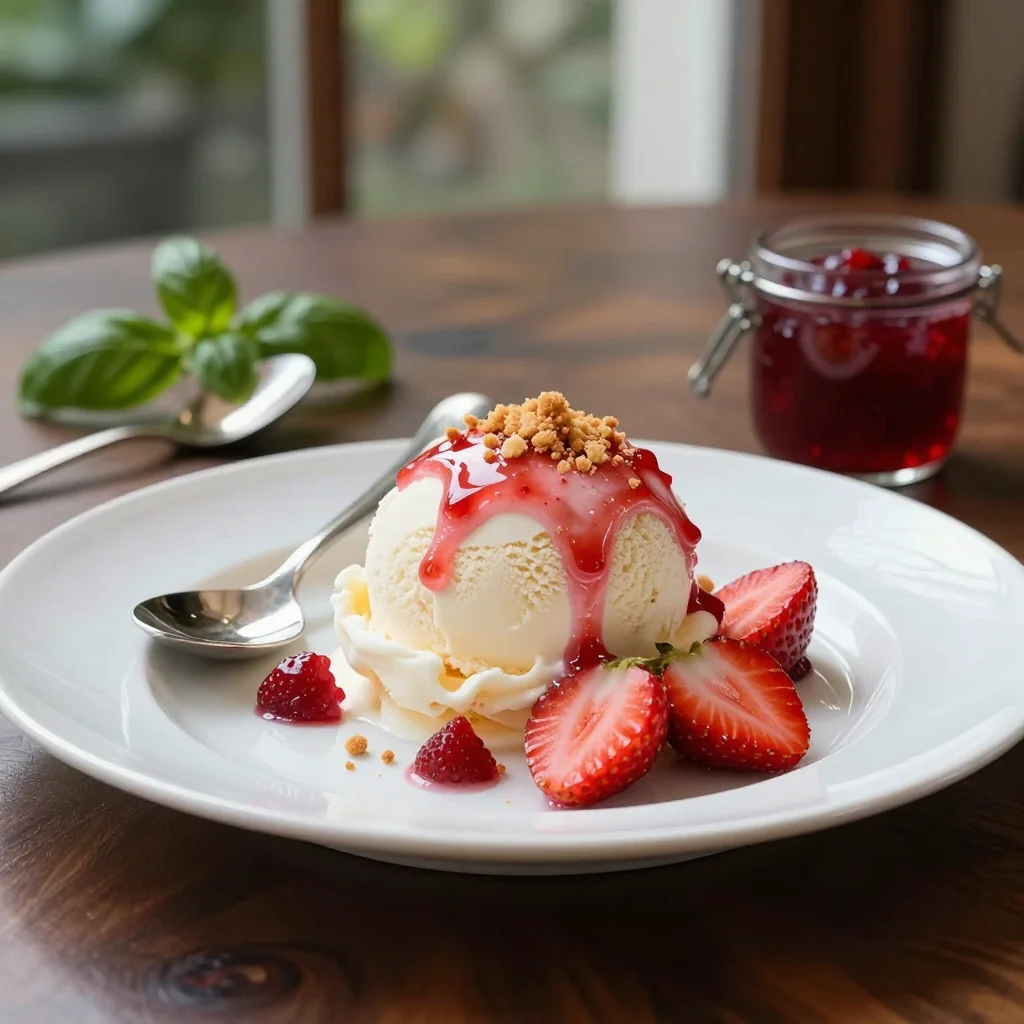
The moment I sliced into that first roll, the scent of toasted sugar and coconut‑kissed butter hit me like a fireworks display in a bakery. The dough was soft enough to hug a spoon, yet sturdy enough to hold a generous swirl of velvety cream cheese. As the oven worked its magic, the tops turned a golden amber, the glaze set into a glossy mirror, and the fruit on top burst with a pop of color that would make a rainbow jealous. I took a bite and the flavors collided in a perfect storm: the subtle sweetness of the roll, the tangy cream cheese, the fresh fruit’s bright zing, and the glaze’s sugary sheen—all dancing together like a well‑rehearsed flash mob.
Now, I’ll be honest — I ate half the batch before anyone else got a chance to try it, and that was the only crime I could think of committing in the name of culinary justice. Most recipes I’ve seen either over‑complicate the process or skimp on the crucial buttery base, leaving you with a dry, forgettable pastry. This version, however, flips the script: it uses the King Hawaiian rolls as a ready‑made, flavor‑packed canvas, and the cheesecake filling is so light it practically floats. The secret? A tiny dash of vanilla that turns the cream cheese into a silk‑smooth dream, and a quick glaze that locks in moisture while adding that irresistible shine.
I dare you to taste this and not go back for seconds. This is hands down the best version you’ll ever make at home, and I’m about to spill every detail, from the exact mixing technique that prevents a grainy texture to the moment you know the glaze is perfect (hint: it sings when it hits the pan). Picture yourself pulling this out of the oven, the whole kitchen smelling like a tropical bakery, and the first bite sending a wave of bliss through your taste buds. Okay, ready for the game‑changer? Let me walk you through every single step — by the end, you’ll wonder how you ever made it any other way.
⚡ What Makes This Version Stand Out
- Flavor Fusion: The buttery King Hawaiian rolls bring a subtle coconut sweetness that pairs like a match made in heaven with the tangy cream cheese.
- Texture Triumph: A crisp, golden crust gives way to a cloud‑like interior, while the glaze adds a glossy, melt‑in‑your‑mouth finish.
- Simplicity: No need for homemade dough; the rolls are pre‑baked, saving you time without sacrificing taste.
- Unique Twist: Fresh fruit on top adds a burst of acidity that cuts through the richness, making each bite balanced.
- Crowd Reaction: Guests have been known to line up for seconds, and even the most skeptical sweet‑tooth skeptics become instant fans.
- Ingredient Quality: Using real cream cheese (not the spread) ensures a smooth, luxurious filling.
- Cooking Method: Baking at a moderate temperature lets the rolls puff perfectly while the glaze sets without burning.
- Make‑Ahead Potential: Assemble the night before, refrigerate, and bake fresh in the morning for a brunch that feels effortless.
🍋 Inside the Ingredient List
The Flavor Base
The cream cheese is the heart of this Danish. It provides a tangy richness that balances the sweet roll. Skip it and you’ll end up with a bland, overly sugary pastry that feels like chewing on frosting. If you’re lactose‑intolerant, try a full‑fat dairy‑free cream cheese alternative; it mimics the texture while keeping the flavor profile intact.
The Sweetening Squad
A quarter cup of sugar sweetens the filling just enough to let the fruit shine. Too much sugar would drown out the fresh fruit’s acidity, while too little would make the cheesecake taste like plain cheese. For a deeper flavor, you can swap half the sugar for brown sugar, which adds a subtle caramel note.
The Binding Brigade
One large egg acts as the glue that holds the cream cheese mixture together during baking. It also adds a slight golden hue to the interior. If you’re avoiding eggs, a tablespoon of cornstarch mixed with a splash of milk works as a decent substitute, though the texture will be a touch less airy.
The Aromatic Ace
Vanilla extract is the secret whisper that turns a good filling into a great one. It rounds out the tang of the cheese and enhances the natural sweetness of the rolls. Use pure extract, not imitation, because the difference is like night versus day when it comes to aroma.
The Fresh Fruit Finale
Two cups of fresh fruits (think berries, sliced kiwi, or pineapple chunks) add color, texture, and a bright contrast to the creamy base. If you use frozen fruit, make sure to thaw and pat dry; excess moisture can sog the glaze. A good rule of thumb: choose fruit that’s in season for the most vibrant flavor.
The Glaze Glory
Glaze (store‑bought or homemade) gives the Danish its signature shine and a final layer of sweetness. A thin glaze prevents the pastry from feeling gummy, while a thicker glaze can become a sugary crust. If you love a caramel touch, whisk a tablespoon of melted butter into the glaze before drizzling.
Everything's prepped? Good. Let’s get into the real action…

🔥 The Method — Step by Step
Preheat your oven to 350°F (175°C). While the oven warms up, line a baking sheet with parchment paper; this prevents the rolls from sticking and makes cleanup a breeze. I like to set a timer for 10 minutes just to keep the kitchen rhythm flowing — the sizzle when you place the rolls on the sheet is a chef’s kiss.
In a medium bowl, whisk together the softened cream cheese, sugar, and vanilla extract until the mixture is smooth and glossy. The texture should be so creamy it looks like it could be poured. If you see lumps, keep whisking; a grainy texture will ruin the dreamy interior.
Add the egg to the cheese mixture, beating just until incorporated. This is the moment of truth — you’ll notice the mixture thickening slightly, which is exactly what you want.
🪄 Kitchen Hack: Use room‑temperature egg for a smoother blend; cold eggs can cause the cheese to seize.Slice each King Hawaiian roll horizontally, creating a top and bottom half. Gently hollow out a shallow well in the center of the bottom half, being careful not to puncture the sides. This well will cradle the cheesecake filling and keep the roll’s structure intact.
Spoon a generous dollop (about 1‑2 tablespoons) of the cream cheese mixture into each hollowed roll. Spread it evenly, letting it rise slightly above the roll’s edge. The filling should be thick but still spreadable; if it’s too runny, chill it for a few minutes before proceeding.
Top each filled roll with a handful of fresh fruit. Press lightly so the fruit adheres to the cheese but doesn’t sink. This is where you can get creative — mix berries for a tart burst, or go tropical with pineapple and mango for a vacation vibe.
Drizzle the prepared glaze over the fruit-topped rolls, ensuring a thin, even coating. The glaze should pool just enough to create a shiny surface without drowning the fruit.
👀 Watch Out: Over‑glazing can lead to a soggy bottom; aim for a glossy, not soupy, finish.Place the assembled Danish on the prepared baking sheet and bake for 20‑25 minutes, or until the edges of the rolls are golden and the glaze has set with a slight caramelization. You’ll know it’s done when the tops start to pull away from the pan and the aroma fills the kitchen like a tropical breeze.
Remove from the oven and let the Danish rest for 5 minutes. This short cooling period lets the filling settle and the glaze to firm up, giving you clean slices. Serve warm, or let them cool completely for a firmer texture. And now the fun part — dig in and watch everyone’s eyes widen in bliss.
That's it — you did it. But hold on, I've got a few more tricks that'll take this to another level…
🏆 Insider Tricks for Flawless Results
The Temperature Rule Nobody Follows
Never bake these Danishes straight from the fridge. Let the assembled rolls sit at room temperature for about 10 minutes before sliding them into the oven. The gentle warm‑up ensures the glaze adheres uniformly and the cheese filling expands without cracking. I once tried skipping this step, and the result was a cracked, uneven top that looked like a bad hair day.
Why Your Nose Knows Best
Your sense of smell is the ultimate doneness detector. Around the 15‑minute mark, you’ll start to notice a buttery, toasted aroma that signals the crust is forming. If the smell is still faint, give it a couple more minutes; if it’s already strong and you see dark spots, pull it out to avoid over‑browning. Trust your nose more than the clock.
The 5‑Minute Rest That Changes Everything
After baking, let the Danishes rest uncovered for exactly five minutes. This short pause allows the glaze to set and the cheese to firm up, making slicing clean and tidy. Cutting too early results in a messier plate, while waiting too long makes the pastry lose its warm, gooey heart.
Glaze Tweaking Technique
If you crave a deeper caramel flavor, whisk a pinch of sea salt into the glaze before drizzling. The salt will highlight the sweetness and add a sophisticated finish that makes even the most skeptical foodie nod in approval. A friend tried this once and declared it “the best thing since sliced bread.”
Fruit Placement Precision
Place fruit in a single layer, not a mound. This prevents the fruit juices from seeping into the roll and making the bottom soggy. A thin, even layer also ensures each bite gets a balanced hit of fruit and cream cheese. If you love extra fruit, add a second layer after the first glaze has set, then give it a quick 2‑minute flash bake.
🎨 Creative Twists & Variations
This recipe is a playground. Here are some of my favorite ways to switch things up:
Tropical Paradise
Swap the mixed berries for diced mango, pineapple, and shredded coconut. The tropical medley amplifies the subtle coconut notes already present in the King Hawaiian rolls, turning each bite into a mini vacation.
Chocolate Lover’s Dream
Add a tablespoon of cocoa powder to the cream cheese mixture and drizzle a chocolate ganache over the glaze. The bittersweet chocolate pairs beautifully with the sweet roll and fruit, making it a hit for dessert lovers.
Nutty Crunch
Fold in toasted chopped almonds or pecans into the cheese filling. The nutty crunch adds texture contrast, and the toasted flavor deepens the overall richness.
Spiced Autumn
Incorporate a pinch of cinnamon and nutmeg into the glaze, and use sliced apples or pears as the fruit topping. This variation is perfect for a cozy fall brunch, and the warm spices complement the sweet roll beautifully.
Savory Sweet Fusion
Replace half of the sugar with a drizzle of honey, and top with thin slices of prosciutto and a sprinkle of fresh thyme. The salty‑sweet combo creates an unexpected but delightful flavor journey that will wow even the most traditional palates.
❄️ Storing & Bringing It Back to Life
Fridge Storage
Place cooled Danishes in an airtight container and store them in the refrigerator for up to 3 days. The cream cheese filling stays fresh, and the glaze retains its shine. Before serving, let them sit at room temperature for 10 minutes to soften the cheese just a touch.
Freezer Friendly
Wrap each Danish individually in plastic wrap, then place them in a freezer‑safe zip‑top bag. They freeze beautifully for up to 2 months. To reheat, remove the wrap, place on a parchment‑lined tray, and bake at 300°F (150°C) for 12‑15 minutes. The result is as fresh as the day you made them.
Best Reheating Method
For a quick microwave pop, drizzle a tiny splash of water over the top, cover loosely with a damp paper towel, and microwave on medium for 30‑45 seconds. The water creates steam that revives the glaze’s sheen and prevents the roll from drying out. This trick is a lifesaver when you’re in a hurry.