When I was ten, my grandmother’s kitchen smelled like a sweet sunrise—cinnamon, cocoa, and the faint blush of beetroot that she used for a special “red” cake. I still remember the moment the batter hit the wooden spoon, turning a deep, velvety crimson that seemed to capture the joy of a summer carnival. That memory sparked my lifelong fascination with color and flavor, leading me to experiment with the classic red‑velvet cookie and, eventually, to discover the perfect partnership with silky white chocolate chips.
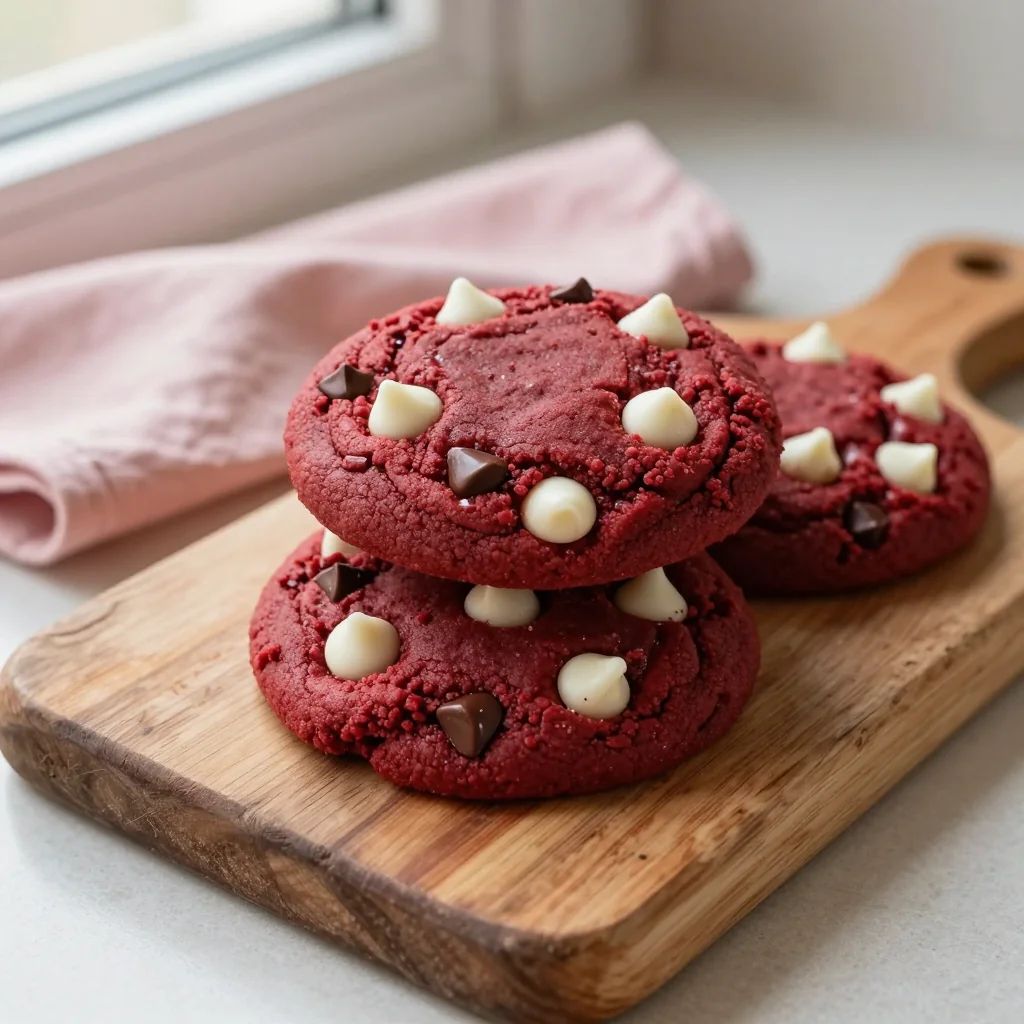
Red velvet, originally a Southern staple, has traveled far beyond its humble origins. The subtle cocoa flavor, the tender crumb, and that signature ruby hue make it a crowd‑pleaser at any gathering. Adding white chocolate chips introduces a creamy contrast that elevates the texture and adds a burst of sweetness that feels both luxurious and comforting.
In this guide, you’ll learn how to achieve a flawless, bakery‑grade crumb, how to balance the intense color without bitterness, and how to incorporate white chocolate chips so they stay glossy and melt‑in‑your‑mouth. I’ll walk you through each step, share pro‑level tips, and even give you ideas for variations that will keep this recipe fresh all year long.
Grab your mixing bowls, preheat the oven, and let’s create a batch of cookies that will become the star of your dessert table.
🌟 Why This Recipe Will Win Your Heart
From the moment you bite into these cookies, you’ll understand why they’ve become a beloved staple in my kitchen.
- ✨ Stunning Visual Appeal: The deep ruby color is achieved with natural food coloring and a touch of beet juice, ensuring the cookies look as spectacular as they taste.
- ✨ Perfect Balance of Sweet and Cocoa: A modest amount of cocoa powder provides depth without overwhelming the delicate crumb.
- ✨ Creamy White Chocolate Contrast: The white chocolate chips add buttery richness that complements the subtle cocoa notes.
- ✨ Soft‑Chewy Texture: The combination of butter, buttermilk, and a precise baking time yields a cookie that’s soft in the center yet slightly crisp around the edges.
- ✨ Easy to Scale: The built‑in portion adjuster lets you make a small batch for a family gathering or a large batch for a party without re‑calculating every ingredient.
- ✨ Versatile for Any Occasion: Whether you’re serving them at a brunch, a holiday party, or a casual tea, these cookies fit perfectly.
🥗 Ingredients
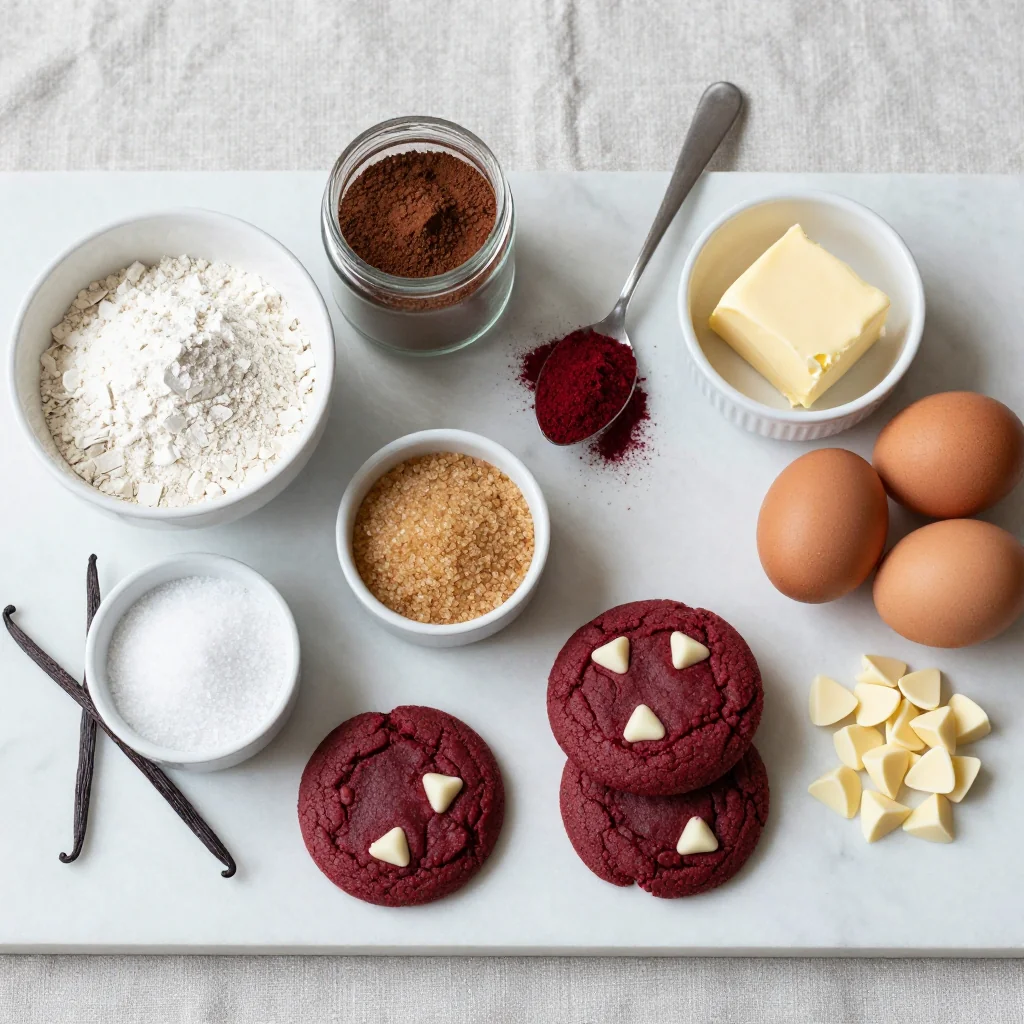
📝 Complete Ingredient List
For the Cookie Dough:
For the White Chocolate Chips:
For the Optional Glaze:
🔍 Focus on Key Ingredients
All‑Purpose Flour
Flour provides the structural backbone of the cookie. Using a moderate protein flour ensures a tender crumb without becoming cakey. Sift the flour together with cocoa powder to avoid lumps and to evenly distribute the chocolate flavor.
Red Food Coloring (Gel)
Gel coloring gives a deep, uniform hue with less liquid than liquid dyes, preserving the dough’s consistency. A little goes a long way—30 ml is enough for a vibrant shade without making the dough overly wet.
White Chocolate Chips
High‑quality white chocolate chips contain real cocoa butter, which melts smoothly and adds a buttery richness. They stay distinct during baking, creating pockets of creamy sweetness that contrast beautifully with the red‑velvet base.
🔄 Quick Substitutions
| If you don’t have... | Use instead... |
|---|---|
| Buttermilk | 1 cup milk + 1 tbsp lemon juice |
| White chocolate chips | Chopped white chocolate bar |
| Unsalted butter | Salted butter (reduce added salt) |
👨🍳 Step‑by‑Step Instructions
Follow these detailed steps for flawless cookies every time. Prepare your workspace, preheat the oven, and let the aromas guide you.
📋 Phase 1: Preparation & Mise en Place
Gather and measure all ingredients before you begin. This ensures a smooth workflow.
Whisk Dry Ingredients
In a large bowl, whisk together the sifted flour, cocoa powder, baking soda, and salt. The whisk should break up any clumps, creating a light, airy mixture that will later give the cookies a tender crumb. Set the bowl aside and give it a quick tap on the counter to settle the flour.
Cream Butter and Sugars
Using a stand mixer on medium speed, cream the softened butter with granulated and brown sugars until the mixture is pale, fluffy, and slightly increased in volume—about 3–4 minutes. The sugar crystals will dissolve partially, creating a smooth base that traps air for a light texture.
Add Eggs, Buttermilk, and Flavorings
Add the eggs one at a time, beating well after each addition. Then pour in the buttermilk, vanilla extract, and red food coloring. Continue mixing on low speed until the dough is uniformly colored, glossy, and slightly thick. The color should be a deep ruby, not pink.
🔥 Phase 2: Mixing & Baking
Combine dry and wet components, fold in chocolate chips, and bake.
Incorporate Dry Ingredients
Gradually add the dry flour mixture to the wet butter mixture, mixing on low speed just until combined. Over‑mixing can develop gluten, leading to tough cookies. The dough should be thick but still pliable.
Fold in White Chocolate Chips
Using a rubber spatula, gently fold the white chocolate chips into the dough. Ensure they are evenly distributed without crushing them, preserving their shape for those delightful melty pockets.
Portion the Dough
Line a baking sheet with parchment paper. Using a cookie scoop (about 2 tablespoons), drop rounded balls onto the sheet, spacing them 2 inches apart. The dough will spread slightly, so give each cookie enough room.
Bake
Preheat the oven to 175 °C (350 °F). Bake the cookies for 10–12 minutes, or until the edges are set and the tops appear matte. The centers should still look slightly soft; they will continue to firm up as they cool.
✨ Phase 3: Finishing & Serving
Cool, glaze (optional), and present.
Cool on a Wire Rack
Allow the cookies to rest on the baking sheet for 2 minutes, then transfer them to a wire rack to cool completely. This prevents them from becoming soggy from steam trapped underneath.
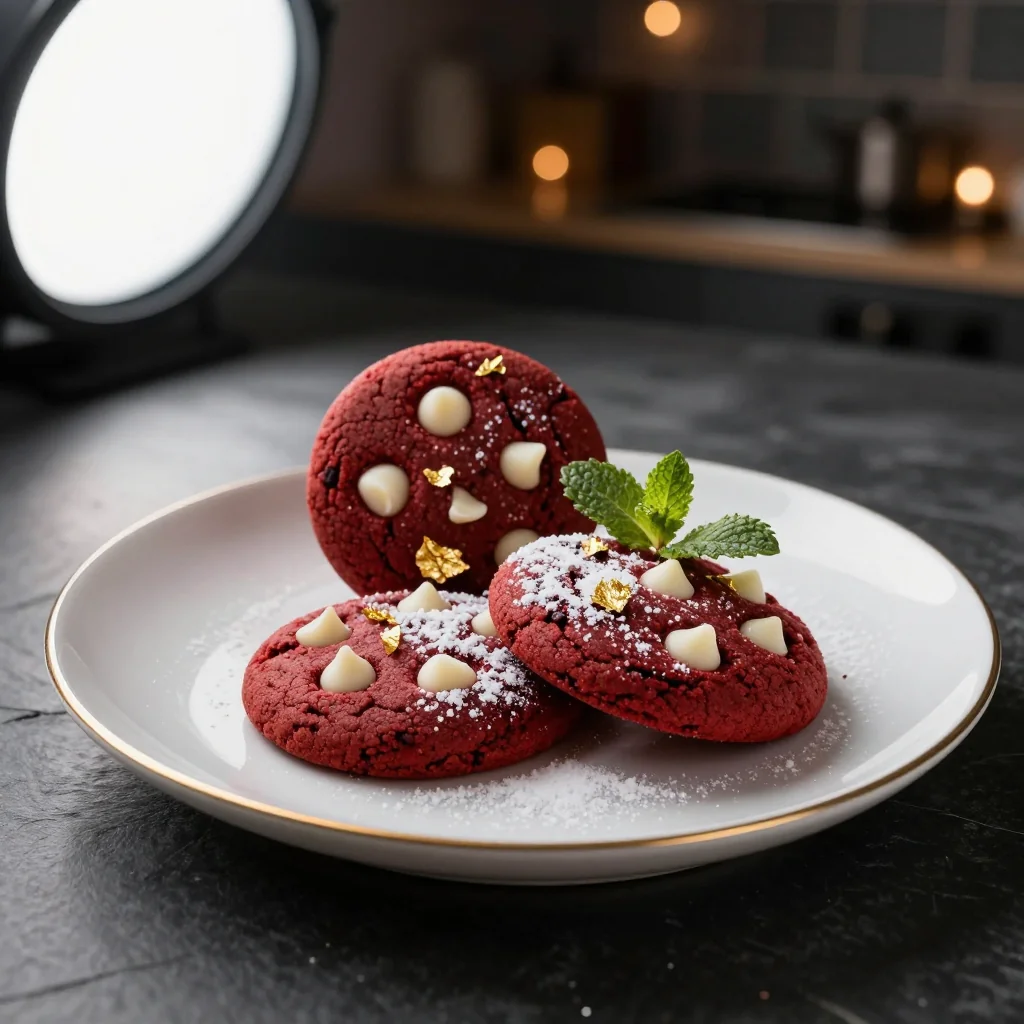
Optional White Chocolate Glaze
If you desire an extra glossy finish, melt the heavy cream, chopped white chocolate, and butter together over a double boiler. Stir until smooth, then drizzle the glaze over the cooled cookies using a spoon or a small piping bag.
Serve and Store
Arrange the cookies on a decorative platter. They pair beautifully with a glass of chilled milk or a sparkling rosé. Store any leftovers in an airtight container at room temperature for up to five days.
💡 Expert Tips & Tricks
🛒 Choosing the Right Ingredients
Look for butter that is labeled “European‑style” for higher butterfat—it yields a richer flavor. For white chocolate chips, avoid “compound” varieties that contain vegetable fats; real cocoa butter gives a smoother melt. When selecting cocoa powder, choose a “Dutch‑process” type for a deeper, less acidic flavor that complements the red hue.
🔪 Preparation Techniques
Room‑temperature eggs incorporate more easily, preventing a curdled batter. Cream the butter and sugars long enough to incorporate air, which is crucial for a light crumb. When folding in the chips, use a gentle “cut‑and‑lift” motion to keep the chips intact.
🌡️ Mastering the Bake
Every oven varies; use an oven thermometer to confirm the 175 °C setting. The cookies are done when the tops lose their glossy sheen. Over‑baking leads to a dry interior, so pull them out as soon as the edges set.
🍽️ Presentation & Service
For a restaurant‑style finish, dust the cooled cookies lightly with powdered sugar or a pinch of edible gold dust. Serve them on a slate board with fresh berries to add a pop of acidity that balances the sweetness.
🏆 Pro Tips
These insider secrets separate a good batch from a show‑stopping masterpiece.
- 🎯 Precise Temperature Control: Butter softens too quickly in a warm kitchen, causing the dough to become greasy. Keep butter chilled until just before creaming, and if your kitchen is hot, chill the dough for 15 minutes before scooping.
- 🎯 Color Chemistry: Beet juice adds natural color but also moisture. Using gel coloring avoids extra liquid, ensuring the dough’s consistency stays perfect.
- 🎯 Even Chip Distribution: Toss the chips with a teaspoon of flour before folding them in. This thin coating prevents them from sinking to the bottom during baking.
- 🎯 Portion Consistency: Use a cookie scoop with a 2‑tablespoon measurement. Consistent size guarantees uniform baking and a professional look.
- 🎯 Glaze Timing: Apply the white chocolate glaze while the cookies are still warm (but not hot). The glaze will set with a glossy finish without cracking.
- 🎯 Storage Science: Store cookies with a slice of bread in the container; the bread releases moisture that keeps the cookies soft for longer.
“Great baking is about chemistry, patience, and a dash of love. When you master the fundamentals, the flavors sing on their own.” — Thomas Keller
🔄 Variations & Adaptations
Feel free to experiment with flavors, textures, and dietary needs while keeping the core essence of this cookie.
🥬 Vegetarian/Vegan Version
Replace butter with equal parts coconut oil or a vegan butter substitute. Use plant‑based white chocolate chips (made with cocoa butter and soy lecithin). Substitute eggs with a flax‑egg mixture (1 tbsp ground flaxseed + 3 tbsp water per egg, let sit 5 minutes).
- Vegan butter adds a subtle coconut aroma that pairs nicely with the cocoa.
- Flax‑egg provides binding while keeping the cookies moist.
🌶️ Flavor Variations
Explore different taste profiles by tweaking the mix‑ins or the glaze.
Spicy Version:
Add ½ tsp ground cinnamon and a pinch of cayenne pepper to the dry ingredients. The heat accentuates the chocolate and creates a warm, lingering finish.
Mediterranean Version:
Fold in ¼ cup finely chopped pistachios and a teaspoon of orange zest. Drizzle with a thin orange‑infused glaze for a bright, nutty contrast.
Asian Fusion Version:
Replace white chocolate chips with matcha‑flavored white chocolate and add a drizzle of black sesame glaze. The earthy green and nutty sesame create a sophisticated balance.
⚠️ Dietary Adaptations
Gluten‑Free:
Swap all‑purpose flour for a 1:1 gluten‑free flour blend that contains xanthan gum. Ensure the blend is well‑sifted to avoid gritty texture.
Lactose‑Free:
Use lactose‑free butter and lactose‑free white chocolate chips. Coconut cream can replace heavy cream in the glaze.
Low‑Calorie:
Reduce butter by 25 % and replace half the sugar with a natural sweetener like erythritol. Keep the white chocolate chips but limit to ½ cup to cut calories.
👶 Family/Children Friendly Version
For younger palates, reduce the cocoa powder to 1 tbsp and increase the white chocolate chips to 1 ½ cups. Add a light vanilla glaze instead of a rich chocolate glaze for a milder sweetness.
📦 Storage & Reheating
🧊 Conservation
In the Refrigerator:
- Duration: Up to 5 days
- Recommended container: Airtight glass jar
- Tip: Place a slice of fresh bread on top to maintain softness.
In the Freezer:
- Duration: Up to 3 months
- Method: Layer cookies between parchment sheets in a zip‑top bag.
- Defrosting: Transfer to the refrigerator overnight or microwave for 10 seconds.
💡 For best flavor, consume within a month of freezing; the white chocolate may absorb freezer odors if stored too long.
♨️ Reheating
🔥 In the Oven (Recommended):
- Preheat to 150 °C (300 °F).
- Place cookies on a baking sheet and cover loosely with foil.
- Heat for 5–7 minutes, until the interior feels warm.
- Remove foil and warm an additional 2 minutes for a slightly crisp edge.
⚡ In the Microwave (Quick):
- Place a cookie on a microwave‑safe plate.
- Heat on medium power for 10–12 seconds.
- Check temperature; add 5‑second bursts if needed.
🍳 In a Skillet:
Heat a non‑stick skillet over low heat, add the cookie, cover, and warm for 30 seconds per side. This method revives the crisp edge while keeping the center soft.
🍷 Perfect Pairings
🥗 Accompaniments
- Fresh Berry Salad: A mix of strawberries, blueberries, and mint adds acidity that cuts through the sweetness.
- Light Citrus Sorbet: Lemon or orange sorbet refreshes the palate between bites.
- Whipped Mascarpone: A dollop of lightly sweetened mascarpone provides a creamy counterpoint.
🍷 Wine & Beverage Matches
- Rosé (dry): The fruit notes echo the berries while the acidity balances the richness.
- Late‑Harvest Riesling: Sweetness mirrors the cookies, creating a harmonious duo.
- Non‑Alcoholic: Sparkling elderflower water with a splash of lime.
🍰 Complementary Courses
Begin with a light citrus‑infused gazpacho or a simple arugula salad with vinaigrette. Follow the cookies with a silky vanilla panna cotta topped with a raspberry coulis for a cohesive dessert progression.
❓ Frequently Asked Questions
Q: Can I use liquid red food coloring instead of gel?
A: Yes, but you’ll need to reduce the amount of liquid in the recipe by about 15 ml to keep the dough from becoming too wet. Gel provides a more concentrated hue with less impact on texture.
Q: Why do my cookies spread too much?
A: Over‑creaming the butter and sugar can incorporate too much air, causing excess spread. Also, make sure the butter isn’t melted and that the dough is chilled for 15 minutes before scooping.
Q: How can I make the cookies more cake‑like?
A: Increase the flour by 20 g and add an extra egg yolk. This adds structure and moisture, resulting in a softer, more cake‑like crumb.
Q: My white chocolate chips melt into the dough; what’s wrong?
A: Toss the chips with a small amount of flour before folding them in. This creates a barrier that keeps them intact during baking.
Q: Can I freeze the dough before baking?
A: Absolutely. Shape the dough into balls, place them on a parchment sheet, freeze for 30 minutes, then transfer to a freezer bag. Bake directly from frozen, adding an extra minute to the baking time.
Q: Is there a way to reduce the sweetness without compromising flavor?
A: Reduce the granulated sugar by 25 % and replace the same amount with coconut sugar or a natural sweetener like monk fruit. The flavor will stay balanced while cutting down on refined sugar.
🎉 Let’s Get Baking!
These Red Velvet Cookies with White Chocolate Chips are a celebration of color, texture, and pure indulgence. By mastering the balance of cocoa, butter, and that striking ruby hue, you’ll create a treat that dazzles both the eyes and the palate. Whether you’re serving them at a holiday gathering or enjoying a quiet afternoon with a cup of tea, the cookies promise a memorable experience.
Remember, the key to success lies in precise measurements, gentle folding, and respecting the bake time. Adjust the portions to suit your crowd, experiment with the suggested variations, and most importantly, have fun in the kitchen. Your friends and family will thank you for the delicious masterpiece you’ve crafted.
Have you tried this recipe?
Leave a comment and rating below! Share your photos on Instagram with #VelvetChipCookies for a chance to be featured.
Red Velvet Cookies with White Chocolate Chips
Ruby‑red, soft‑chewy cookies studded with creamy white chocolate chips.
📝 Ingredients
Cookie Dough
White Chocolate Chips
Optional Glaze
👨🍳 Instructions
- 1
Whisk together flour, cocoa powder, baking soda, and salt in a large bowl.
- 2
Cream butter with granulated and brown sugar until light and fluffy.
- 3
Add eggs one at a time, then stir in buttermilk, vanilla, and red food coloring.
- 4
Gradually mix in the dry ingredients on low speed until just combined.
- 5
Fold in white chocolate chips gently.
- 6
Scoop dough onto parchment‑lined trays, spacing 2 inches apart.
- 7
Bake at 175 °C (350 °F) for 10–12 minutes until edges set.
- 8
Cool on a wire rack; optionally drizzle with white chocolate glaze.
- 9
Store in an airtight container or freeze for later enjoyment.
- 10
Serve with your favorite beverage and enjoy!
🥗 Nutritional Information (per serving)
*Values are estimates based on standard ingredient data.
📚 You Might Also Like
Classic Chocolate Chip Cookies
Raspberry Swirl Cheesecake
Lemon Tart with Meringue


💬 Comments & Reviews
Leave a Comment
No comments yet. Be the first to share your thoughts!