Love this? Pin it for later! 📌
The ultimate crowd-pleasing spread that turns everyday staples into a touchdown-worthy feast—no last-minute grocery run required.
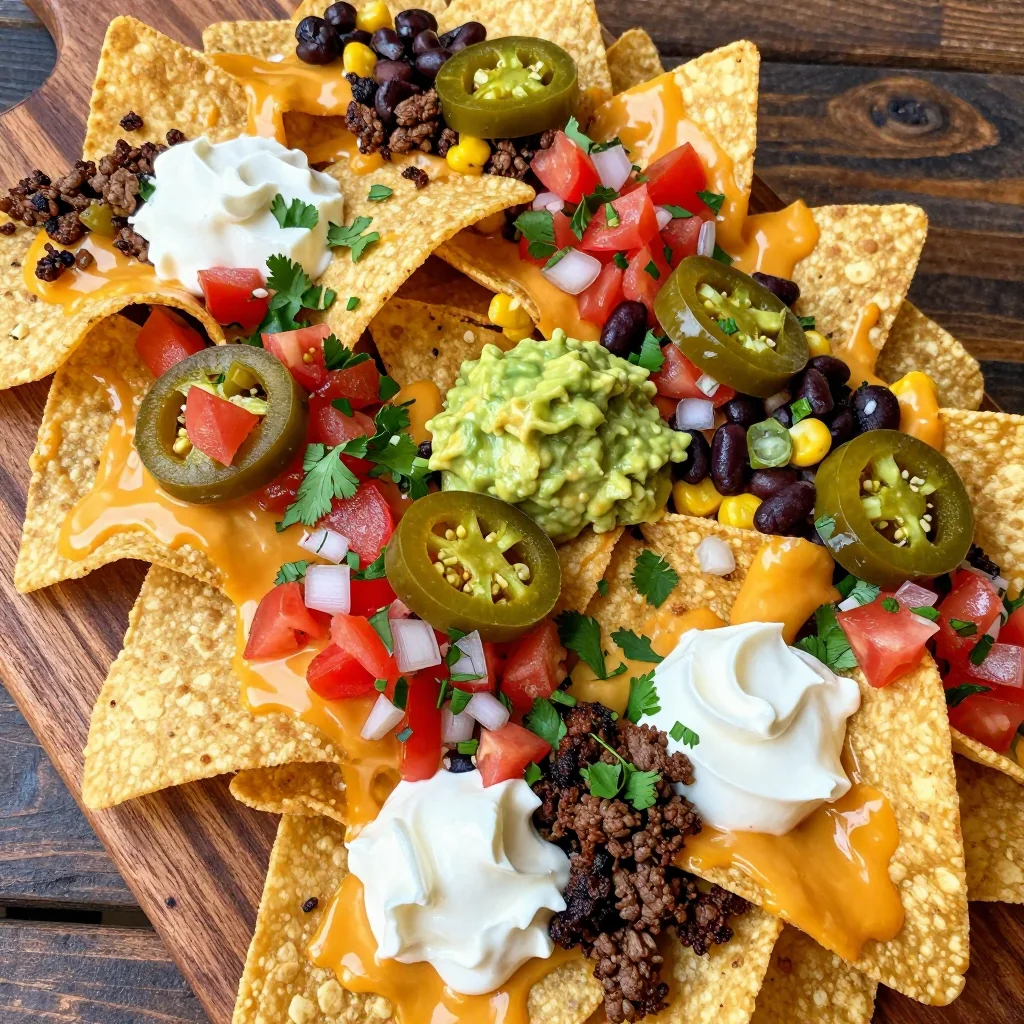
I still remember the first time I hosted game day at my place. It was a playoff Saturday, the kind where the air crackles with anticipation and your living room feels like the 50-yard line. I’d invited what felt like half the neighborhood, only to realize—at 11:30 a.m.—that I hadn’t planned a single bite beyond a sad bag of off-brand tortilla chips. Panic set in. Then I opened the freezer and stared at a jumble of frozen corn, a half-bag of shredded cheese, and some questionable ground turkey. The pantry yielded a can of black beans, a lonely jar of salsa, and a packet of taco seasoning that had seen better days. Thirty minutes later, my coffee table was transformed into a technicolor nacho bar that had grown men cheering louder for the food than for the actual game. That day I learned the power of a well-stocked pantry and a little creativity. This recipe is my tried-and-true evolution of that happy accident: a fully loaded, totally customizable nacho bar built entirely from freezer and pantry staples. It’s week-night-easy, budget-friendly, and guaranteed to make you the MVP of any gathering—whether it’s Super Bowl Sunday, a casual watch party, or a Tuesday night when you just want dinner to feel like a celebration.
Why This Recipe Works
- Pantry-Powered: Every ingredient is shelf-stable or freezer-friendly, so you can shop your own kitchen instead of the store.
- Feed-a-Crowd Scale: One sheet-pan base serves eight hungry fans; double or triple without breaking a sweat.
- 15-Minute Assembly: While the oven preheats, you’ll have toppings prepped and the bar set.
- Customizable Layers: Vegetarian? Gluten-free? Extra-spicy? Everyone builds their dream plate.
- Minimal Dishes: One rimmed pan, one skillet, and a handful of bowls—cleanup is faster than a two-minute drill.
- Budget Hero: Uses inexpensive staples like canned beans, frozen corn, and bulk cheese that cost pennies per serving.
- Make-Ahead MVP: Prep and freeze the meat mixture up to three months; just thaw and reheat for instant nachos anytime.
Ingredients You'll Need
Think of this list as a roadmap, not a rulebook. The magic lies in mixing and matching whatever you already own. Below, I break down each component so you can swap confidently.
Tortilla Chips: Sturdy restaurant-style chips hold weighty toppings without turning to dust. If your pantry only has thin restaurant rounds, layer them between parchment on the baking sheet to prevent sogginess. Blue corn, multigrain, or even flavored lime-chili chips all work—just avoid overly salty varieties since the toppings bring plenty of seasoning.
Protein Power: I keep a 1-pound pouch of frozen ground turkey or beef crumbles for moments like this. If you’re plant-based, a drained can of pinto or black beans mashed with ½ teaspoon smoked paprika delivers the same hearty bite. For a smoky twist, stir in ¼ cup rehydrated TVP (textured vegetable protein) with 1 tablespoon liquid smoke.
Bean Bliss: Canned black beans are my go-to, but kidney, pinto, or even chickpeas rinse-and-drain beautifully. Look for low-sodium versions so you control the salt. Rinse until the water runs clear to remove up to 40 % of the sodium and that metallic “can” flavor.
Freezer Corn: Those little frozen nuggets of sweetness are nacho gold. No need to thaw; they’ll heat through in the oven and add pops of juicy crunch. Substitute with canned corn (drained) or even roasted red peppers if corn isn’t your thing.
Cheese Matters: Pre-shredded cheese is coated with cellulose to prevent clumping, which can make it melt slightly waxy. If you have a block of cheddar or Monterey Jack in the fridge, grate it yourself for the creamiest melt. In a pinch, the bagged stuff still delivers gooey joy—just avoid fat-free varieties that refuse to melt.
Flavor Bombs: A packet of taco seasoning saves time, but if yours vanished into the void, whisk together 1 tablespoon chili powder, 1 teaspoon each cumin and smoked paprika, ½ teaspoon oregano, and a pinch of cayenne. Store the extra in a spice jar for next time.
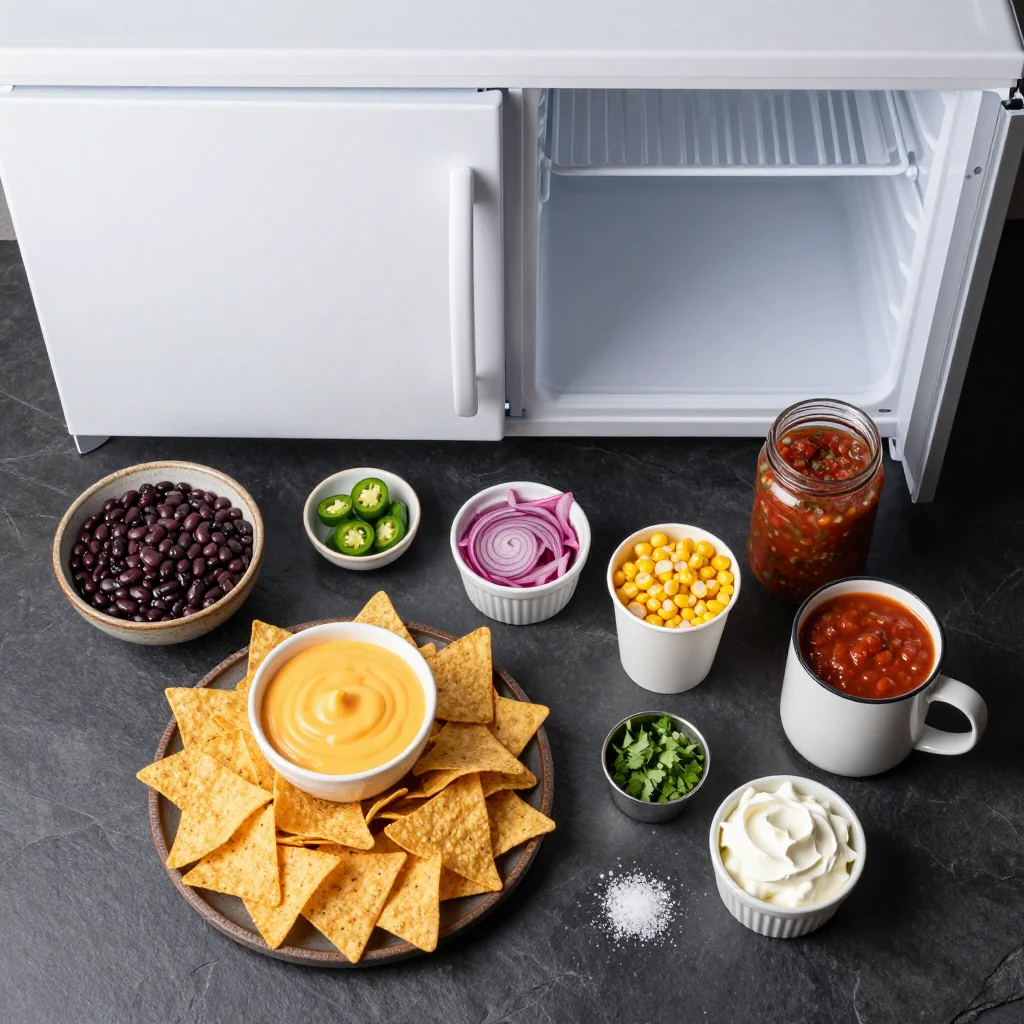
Fresh-ish Toppers: Keep a tube of cilantro paste in the produce drawer; it lasts months and brightens everything. Pickled jalapeños, jarred salsa, and Greek yogurt (a stand-in for sour cream) are all fridge stalwarts with eternal shelf lives. If you have a lime rolling around the crisper, zest it over the finished platter for restaurant-level flair.
How to Make Game Day Nacho Bar Using Freezer and Pantry Items
Preheat & Prep Pans
Set your oven to 425 °F (220 °C). Line a rimmed 18×13-inch sheet pan with parchment or foil for zero-scrub cleanup. If you’re doubling, prep two pans and switch racks halfway through baking.
Sizzle the Meat (or Beans)
In a skillet over medium-high heat, brown 1 pound frozen ground meat, breaking it up as it thaws, about 5 minutes. (No thawing needed—just keep stirring.) Drain excess fat, then stir in 1 tablespoon taco seasoning and ¼ cup water; simmer 2 minutes until thick. For a vegetarian skillet, warm 2 drained cans of black beans with the same seasoning plus 1 tablespoon olive oil for richness.
Build the Base Layer
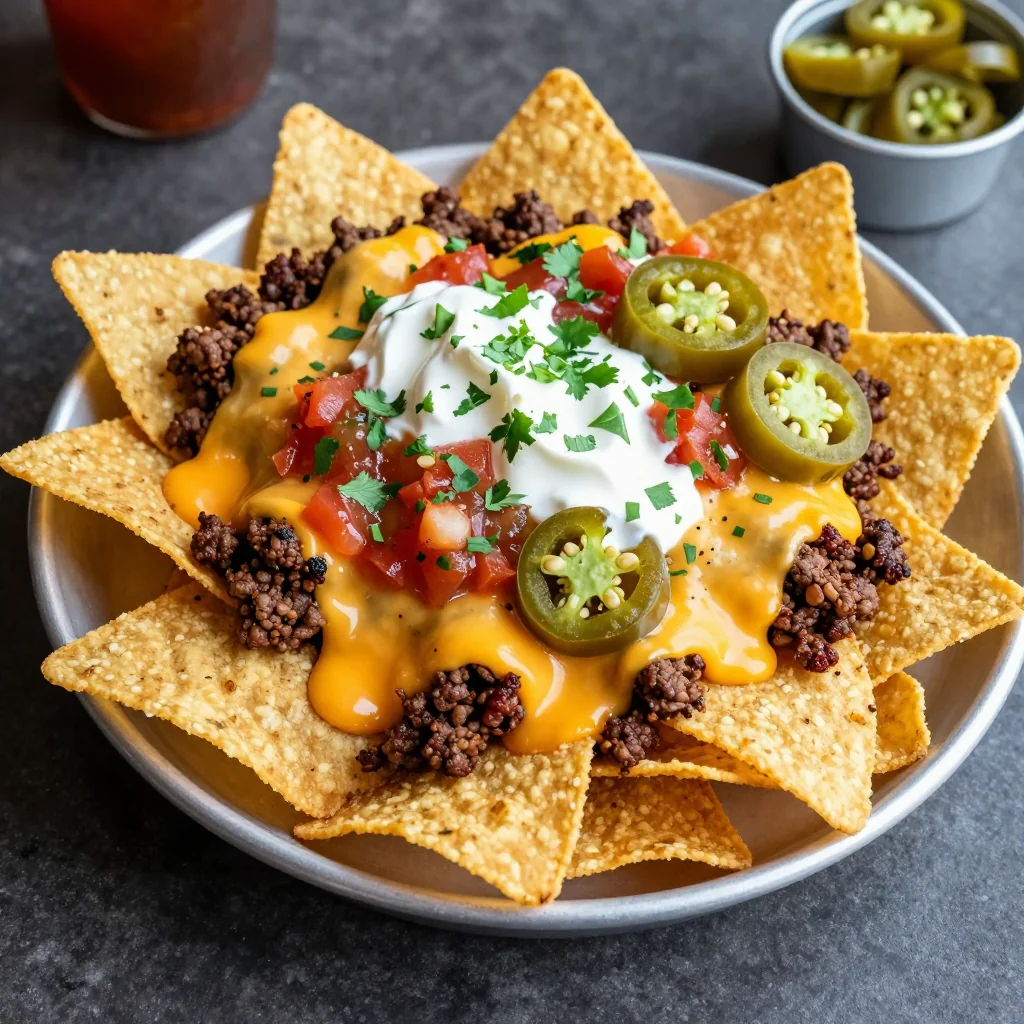
Spread half of a 16-ounce bag of tortilla chips in a single layer on the prepared pan. Overlapping is fine—think mosaic, not math. Sprinkle 1 cup shredded cheese over the chips; this “glue” keeps toppings from sliding off when you pile them high.
Load the Toppings
Scatter the seasoned meat (or beans) evenly, followed by 1 cup frozen corn, 1 cup rinsed black beans, and ½ cup pickled jalapeños. Finish with the remaining cheese—think snowfall, not avalanche so the chips still peek through.
Bake to Gooey Glory
Slide the pan onto the middle rack and bake 8–10 minutes, until cheese is fully melted and edges of chips turn golden. Turn on the broiler for the final 60 seconds for spotty charred bubbles—watch closely so you don’t torch the tips.
Set Up the Bar
While nachos bake, arrange toppings in small bowls: salsa, Greek yogurt, guacamole (or mashed avocado with lime), chopped cilantro, lime wedges, and extra jalapeños. Label each bowl with a sticky note flag so guests know what’s mild versus molten.
Serve & Keep Warm
Place the hot pan on a trivet in the center of the table. Scatter a final pinch of cilantro for color and serve immediately. If the game goes into overtime, keep nachos warm in a 200 °F oven, loosely tented with foil.
Expert Tips
Hot Pan, Cold Toppings
Serving temperature contrast is everything. Bake the chips hot and cheesy, then let cool 2 minutes before adding cold salsa or sour cream to prevent the dreaded sog.
Layer Like a Pro
For mile-high nachos, repeat layers: chips, cheese, toppings, chips, cheese. Just keep the final cheese layer lighter so you can still grab a chip without excavating.
Freeze Before Baking
Assemble the pan, cover tightly with two layers of foil, and freeze un-baked for up to 2 months. Bake from frozen at 400 °F for 20–25 minutes—perfect for surprise guests.
Moisture Management
Pat canned beans and jarred jalapeños dry with paper towels before scattering. Less water equals crispier chips and zero puddle at the bottom of the pan.
Revive Stale Chips
If your chips lost their crunch, spread on a sheet pan and bake at 250 °F for 10 minutes. Cool completely before topping—they’ll be factory-fresh crisp.
Portion Control Hack
Bake individual nacho piles on parchment-lined plates for 5 minutes. Everyone gets their own perfect portion—no fighting over the fully loaded corner pieces.
Variations to Try
-
Buffalo Chicken: Swap ground meat for 2 cups shredded rotisserie chicken tossed with ¼ cup buffalo sauce. Top with blue cheese crumbles after baking.
-
Breakfast Nachos: Use kettle-cooked potato chips, add scrambled frozen egg patties (chopped), and finish with a drizzle of maple syrup and everything-bagel seasoning.
-
Tex-Mex Vegan: Replace meat with walnut “chorizo” (pulse 1 cup walnuts, 2 tablespoons oil, and spices) and use plant-based cheese shreds. Finish with corn-and-mango salsa.
-
White Nacho: Swap cheddar for a blend of Monterey Jack and pepper Jack, add canned white beans, and top with sliced black olives and a swirl of ranch dressing.
-
Seafood Fiesta: Use frozen cooked shrimp (thaw under cold water 3 minutes) and lump crabmeat; bake only 5 minutes to avoid rubbery seafood. Finish with pico de gallo.
Storage Tips
Leftover Nachos: Separate chips from toppings before storing. Refrigerate meat and bean mixture in an airtight container up to 4 days; reheat in a skillet over medium with a splash of water to loosen. Chips themselves don’t refrigerate well—they’ll suck up moisture—so keep them in a zip-top bag at room temperature and rebake 5 minutes at 350 °F to restore crunch.
Make-Ahead Meat: Double the seasoned meat and freeze flat in a labeled quart bag for up to 3 months. Thaw overnight in the fridge or 5 minutes in the microwave, then proceed with nacho assembly.
Cheese Prep: Shred a bulk block of cheese, toss with 1 teaspoon cornstarch to prevent clumping, and freeze in 1-cup portions. Grab and sprinkle straight from frozen—no need to thaw.
Bar Leftovers: Leftover toppings? Stir salsa into tomorrow’s soup, fold Greek yogurt into muffin batter for extra moisture, and blend pickled jalapeños into mayo for a quick spicy spread.
Frequently Asked Questions
Game Day Nacho Bar Using Freezer and Pantry Items
Ingredients
Instructions
- Preheat & Brown: Preheat oven to 425 °F. In a skillet, cook frozen ground meat with taco seasoning until browned, about 6 minutes.
- Layer Chips: Spread half the tortilla chips on a parchment-lined sheet pan. Sprinkle with half the cheese.
- Add Toppings: Distribute meat, beans, corn, and jalapeños evenly. Top with remaining cheese.
- Bake: Bake 8–10 minutes, until cheese is melted and edges are golden. Broil 1 minute for extra browning.
- Finish: Garnish with cilantro and serve hot with salsa, yogurt, and lime wedges on the side.
Recipe Notes
For crisp leftovers, store components separately and reheat chips at 350 °F for 8 minutes. Freeze uncooked assembled pan up to 2 months; bake from frozen at 400 °F for 20 minutes.